Alright. Now time to look at eyes in some detail. This will be a short set as on Friday I have a little treat for you, a halloween special! Get your spooky on ready but until then, back to eyes. The basic thing to know is there are three main shapes to choose from (with many variations of course), rectangular, oval and triangular. I would use rectangular eyes for cheerful or normal characters, oval for mysterious, serious or Asian characters and triangular for those with a more menacing appearance (perhaps a villain, someone who takes no nonsense or a really serious person, more so than oval). The construction of eyes will not be delved into in that much detail as they are actually very simple, however I will be posting a tutorial constructing a single complex eye in great detail later on. This tutorial is more the basics on different shapes. Just take a good look below.
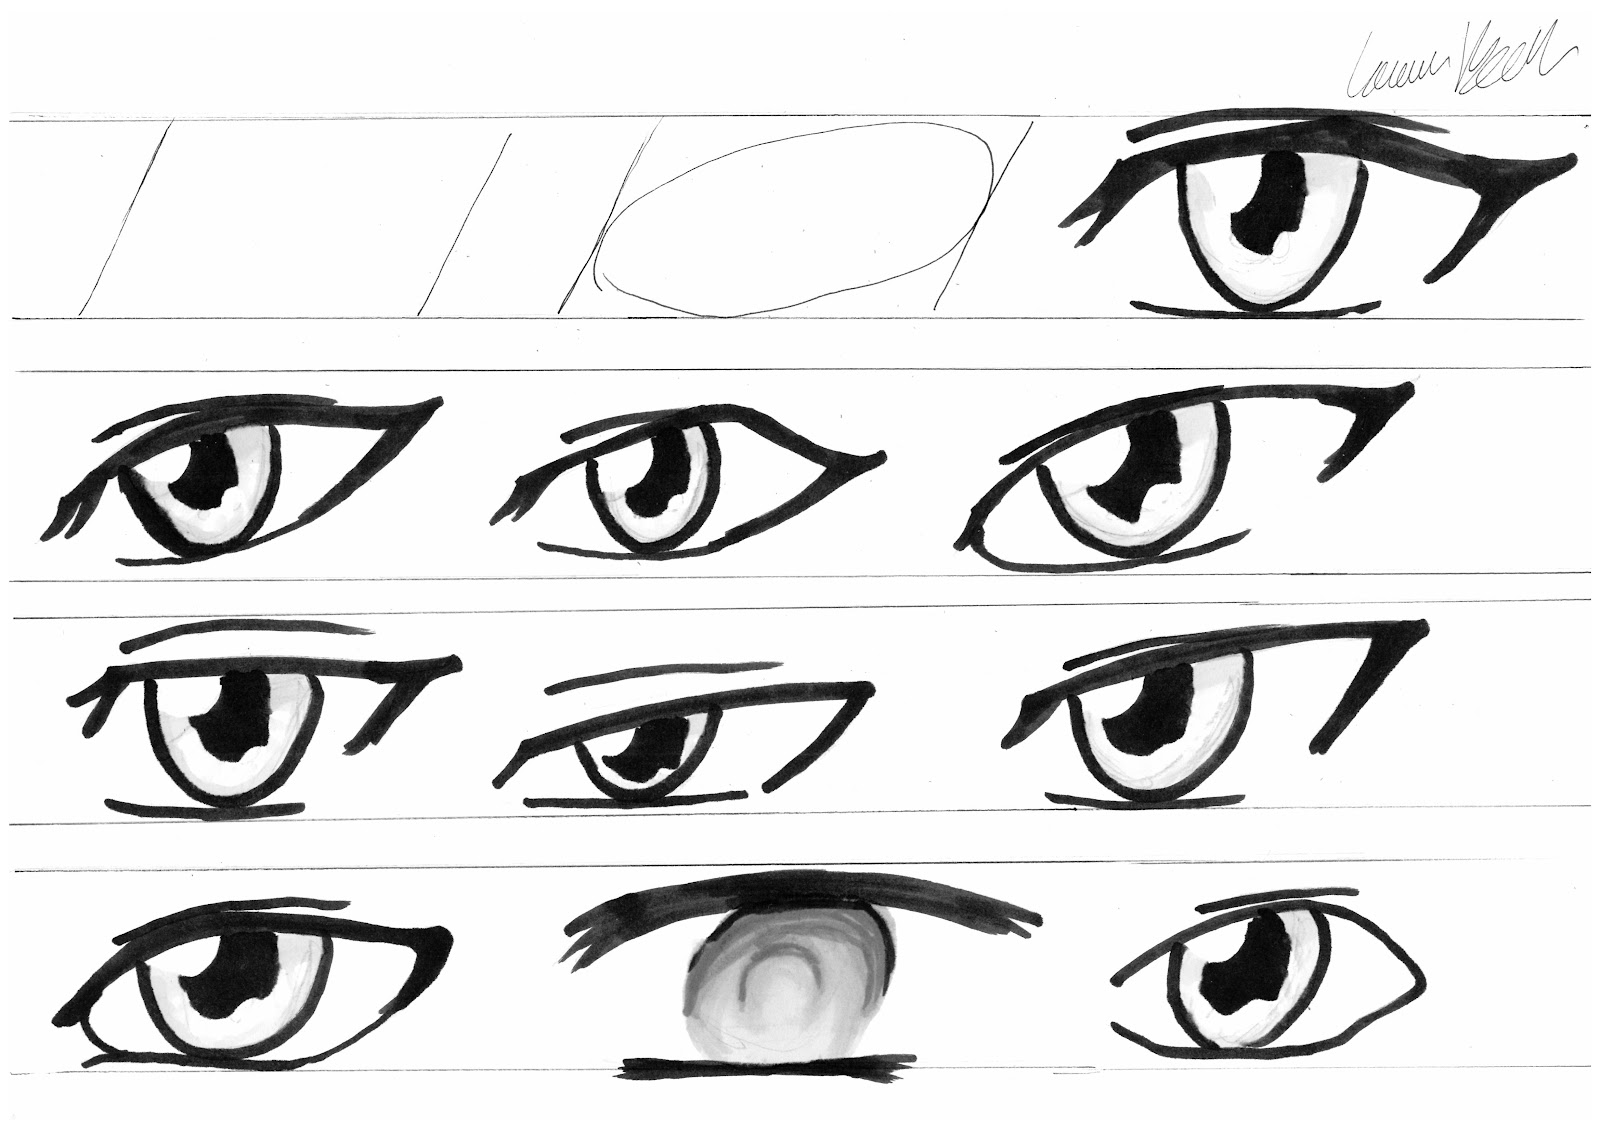
Firstly we see how the guidelines for the eye (see head tutorial) can be used as is or with an oval inside them (at varying angles depending on what type of character we have). The first eye is plain rectangular with a kink in the top line just over halfway along (outside edges of all eyes here is to the right). This type of eye is literally drawn 'as is' inside the guide. Men don’t tend to have large eyelashes but I like to give most of my men a little point on the inside and out depending on eye shape as they tend to be more feminine. The more lashes, the girlier he will look. Although the iris is round, not all of it is visible so it always looks like a half moon/incomplete circle when neutral.
The row below shows three oval eyes. Notice how the main difference lies in whether or not the lines are smooth (more feminine/kind) or angular and where the eye outline is ‘open’. For Asian characters I recommend the inside of the eye to be closed and the opening on the outside. It just looks more Asian that way. Also tilt can be important. The middle one is ‘straighter’ than the outer two. I give my very mysterious or elven characters tilted eyes and more human characters straighter ones although it is all personal preference. Tilted eyes can also make a character look sly or shifty.
Next we have a straight topped rectangular eye (in contrast to the more open and kinder looking kink topped rectangular eye) followed by two more triangular in appearance. Notice how all of these eyes are neutral but the narrower triangular eyes or straight tops automatically look more serious or angry than the wide or round ones.
The final row gives some more stylised variations on oval and rectangular. In the middle you can also see a more stylized iris and pupil a bit more like the style seem in the works of Matsuri Hino (or my poor imitation therof). I recommend starting with the simple pupil and iris with highlights, then moving on to adding more detail to the iris (lines and shadow) before moving on to study more complex approaches. The detail is usually lost on anything but an extreme close up anyway. In short, pick a style you are comfortable with and suits your character.
Take these three basic shapes and toy with them. Pick a shape carefully for each character taking into account above points. Try to make every characters eyes unique in some way (unless they are related) and really make them reflect the personality within. The next guide today will be on how we can express some emotion with those eyes so you won’t be stuck drawing one facial expression over and over. If you need anything in more detail just drop a comment and I will be happy to oblige.
No comments:
Post a Comment