At the request of my dear sister, The next tutorial will be on hands. Dreadfully difficult little things to draw or so everyone says, but if you ever get stuck remember, you have a pair yourself! A mirror can become invaluable when drawing that awkward pose or angle, just remember that a left hand becomes a right one in the mirror and vice versa. Take a look at the image below.
The main thing to remember about hands is they are essentially a flat box with some tubes attached. That’s right. A box with some slightly squared off cylinders attached and a bit of a triangle for the thumb base. Not so intimidating now are they? Seriously everyone stresses about hands when all they require is a bit of practice and patience, (it took me… actually I am not admitting how long it took me to get to my current hand drawing level but it did take an embarrassingly long time so don’t be discouraged). Each space between the line here represents quarter of a head for those wondering roughly how big a character’s hands should be. If you rest your hand against your face your fingers should just reach your brow… at least mine do.
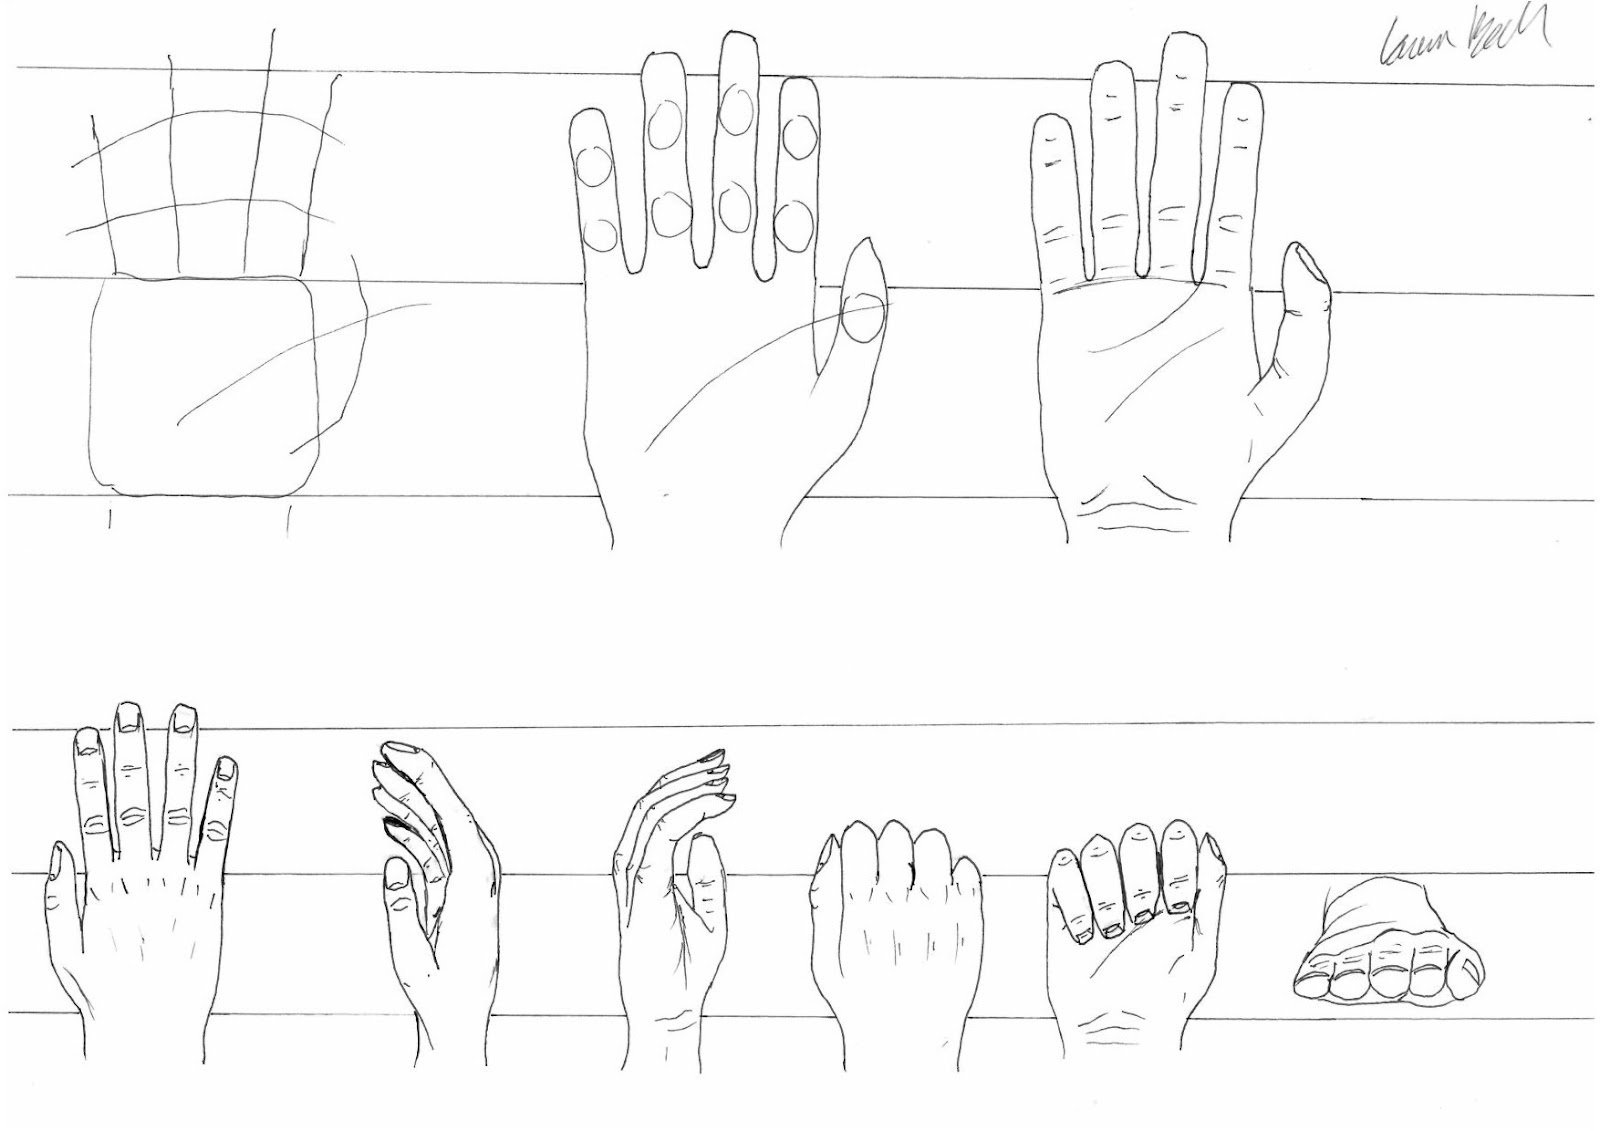
First draw the palm (a box, roughly square for front or back view and much narrower for the sides). From here add lines for four fingers and a thumb, pay close attention to their lengths, the ‘middle finger’ tends to be longer than the other three with the pinky being the shortest. The ring finger and index finger are roughly the same length in women while the ring finger is slightly longer in men (mostly, this is actually my hand and it has more of a male setup despite me being female, exceptions do exist).
Draw some circles for the joints and flesh out the fingers. The thumb will be the hardest part but think of it as a dumpy finger attached to the palm by a sort of triangle. The major palm creases run in an arc from the top thumb joint and another from between the index and middle fingers. Add the creases on the wrist and the fingers and done! Not so hard really is it? Half the battle is getting the fingers the right length and having some form other than shapeless tubes (which I fail at most of the time). For the top, the only definition you tend to see is around the knuckles, joints (more creases than the underside sort of in an oval) and sometimes the tendons on the back of the hand.
The example here is a right hand but flip them if you need left. I have included some common angles for you to use as reference. Using the images of all fingers down you should be able to draw some down and some up. Use your own hands and a mirror to practice some more. After all, it’s only a box and some cylinders! Sorry if the font changes partway on you guys... the preview changes it even though it is all in the same font, honest! Computers eh? What can you do. *shrugs*
No comments:
Post a Comment